


For part two of this series, and given the number of questions I receive about what I use, I'm dedicating this post to blog props. I've already a post from several months ago about prop ideas, which you might want to refer back to if you so wish, and for today's post I'm going to be sharing some 'propping' tips and tricks, more about the how and why I use items, and a little DIY so you can hopefully achieve the photos you so desire! This is a long one lovelies so grab a snack and a blanket and I hope you find it helpful!
OWN NICE THINGS + DEVELOPING YOUR PERSONAL STYLE
I say 'own nice things' in a slightly tongue-in-cheek manner, but having beautiful items to photograph is half the battle towards capturing a gorgeous shot. Whilst I hear many a blogger talk of 'prop boxes' or amassing a collection of items they use solely for blogging, I personally tend to find myself buying items that I actually plan to use and cherish in my everyday life, and giving them a secondary purpose as props - it seems a shame to let all my gorgeous trays and trinkets sit in a box! Stealing tissue paper or ribbons from your luxury purchase's packaging for example is a great way to repurpose those small items. The pieces you see in my posts represent my everyday style, and I think the objects you naturally gravitate towards aesthetically, work together best - although I've perhaps gone a bit more 'geometric' and 'marble' than is really me! It's really quite challenging not to get roped in to what is 'current' or 'trendy'..
A quick side note actually - I had quite a bit of feedback on my questionnaire (thank you for filling that in to all that did!) with regards to sharing more of my life and behind the scenes which I'd really love to try and do, so thank you for your comments and do bear with me as we go through these upcoming changes!

VARY YOUR OBJECTS
One super simple way I try and create interest in my photographs is by using props of different sizes, heights, shapes, textures and patterns. Rigid lines and geometric shapes can work well with a soft floral print for example, and I like combining different heights in a picture, like a little city skyline made of makeup. In the above photo (source: my Heatless Haircare post), I like the mix of the soft folds of silk, next to the hard edges of my hexagonal tray, the teardrop-shaped petals, next to the spiky porcupine-esque brush.

In this photo (source: my How To Take Brighter Blog Photos post), there are quite a few different shapes and textures; the long, thin pen vs the round, quilted surface of the Dior compact, the oversized sunnies vs that dribble of black ribbon, so even though there isn't much colour, it's still an appealing photograph.
BUILDING LAYERS
I'm often asked how I go about composing a flatlay, and I can't help but put my methodical, mathematical background to good use by working in quite a formulaic manner - by layering. When I'm thinking about my favourite props, they automagically get broken down into three natural subsets for me: background, mid-level and fillers, and that's the order I work in (I'll be doing a separate portion of this series on Composition so I'll include more photos of each step there).
Background - the items that are often broad and flat, good for creating a base layer to assemble a collage of other items upon.
My favourites include: my assortment of marble trays, Porter, Cereal or In Clover, this silky cami (which I have in both colours) or this snuggly knit. I get a lot of questions about my hexagonal marble tray, which I actually had made up for me at a local tile store, but this one is a very close alternative.

Mid-level - the bridge-gapper's between background and detail, and my second layer.
My favourites include: Flowers, candles, pastries and macarons - especially this new candle that F so kindly bought me, it smells so beautifully Spring-like, I'm really in love with it!
Fillers - iddy-biddy items I like to pepper in last if I feel like my composition just needs a little something extra.
My favourites include: Rings, petals, ribbons, sequins, foliage, beads, bits of stationery, the list to choose from is nigh on endless.

Here's an example of one of my photographs where I worked in distinct layers (source: my Digital Detoxing post). I went around placing the background items first, then the mid-level, popped in my phone and notebook, which I wanted centrestage, then added my fillers as little accents or in the case of the candle, to fill in space that looked a little bare.


USING COLOUR
Whilst I absolutely think there's no wrong or right when considering clashing or complimentary colours, muted shades or bright, vibrant hues, I do think that a level of consideration to the colour palette you're working in gives the best results, in my experience anyway! If you're baffled by colour and can't begin to think what might work and what equally might look off, then I'd suggest going one of two ways (do forgive me if this seems blindingly obvious to the majority of you!):
01. Stick with a restricted colour palette. Choose 4-5 colours, one of which is a distinctly uninteresting neutral to ground your photo - and in most of my personal examples, that's white. Try and use both props and items that only include those 4 or 5 colours to bring the photo together.

So let's say I want to write a blog post about the new Pixi Lactic Acid mask (which I've been loving lately btw!). The bottle is a pinky blush tone, with a pale green lid, so blush, light green and white would be my first three colours. I'm also going to add a grey/silver. I then just think about what props I have, in a mixture of heights and shapes etc that I mentioned earlier on, that match the colour palette I've chosen - maybe some pink tulips or some white carnations, a white and grey marble tray, my marble notebook and some silver jewellery to add detail.
And all you have left to do is think about composition, knowing that the colours in your photo are going to work together (although you'll have to forgive the lighting and white balance somewhat in the left photo!) In the photograph on the right, I've just chosen random products that I might use in any post, but I haven't really given any consideration to colour. It looks OK, but to me it just doesn't have the same visual appeal as the photograph on the left - what do you think?

02. Alternatively, pick one colour and work in shades of it. This works well for monochromatic photographs, where I'd be looking for props in white, pale greys, gunmetal greys, silvers and black, (or just all black everything!) or take the photograph on the right, where I've just chosen to go with everything plum and burgundy.
A couple of extra tips:

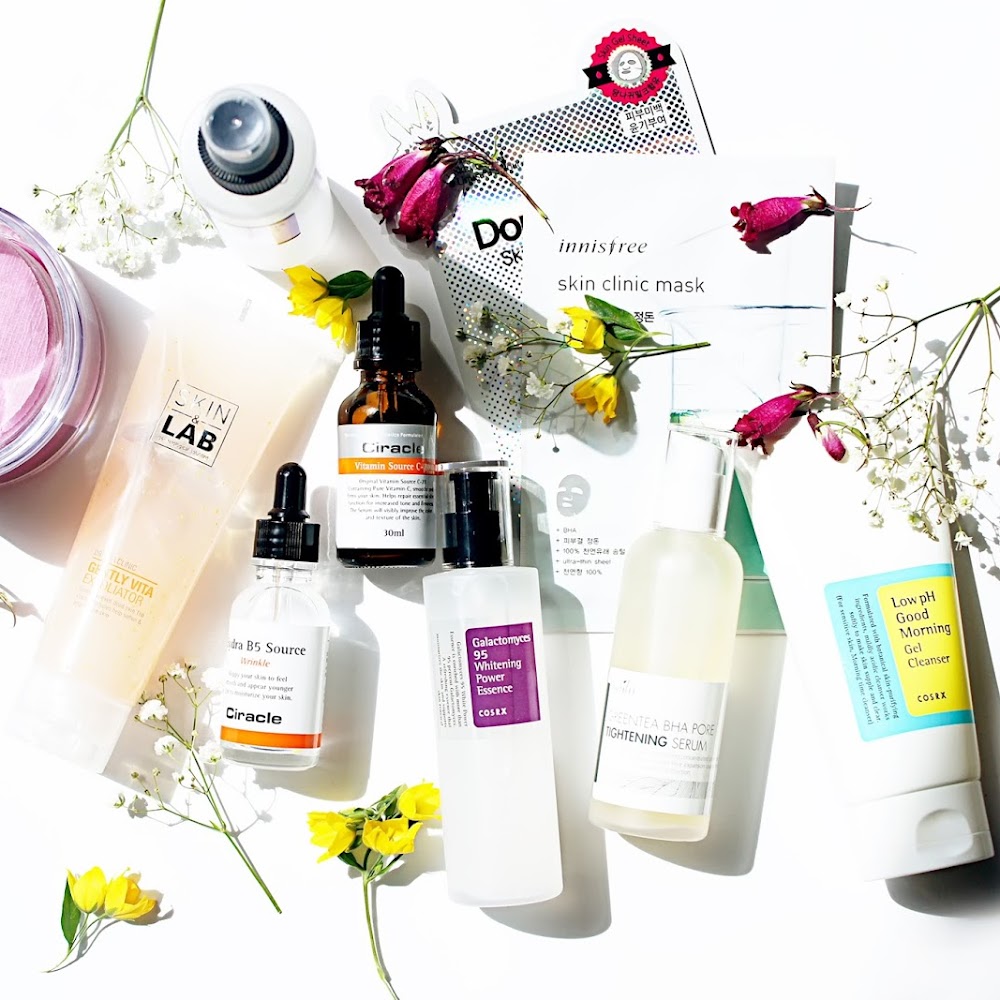
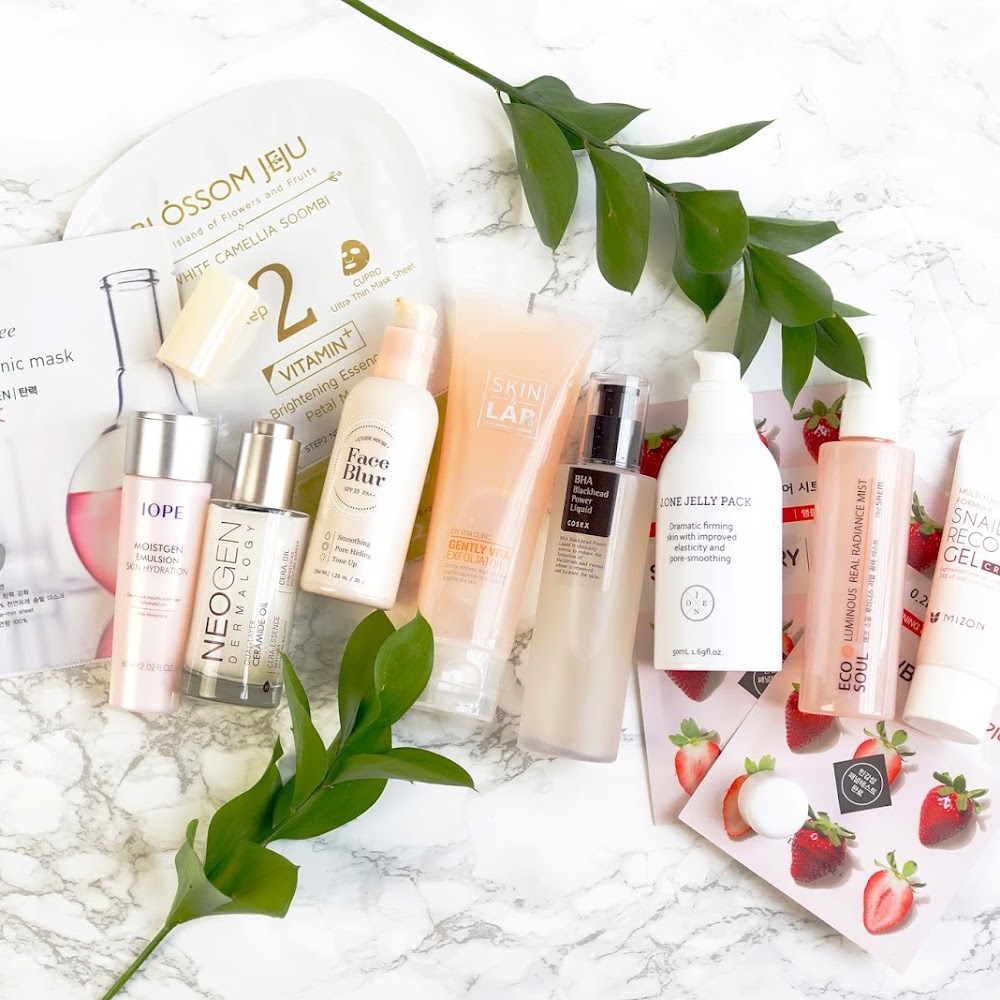
- Something else to try is sticking with a colour palette in the same kinds of tones. Either go with all pastels, or all deep/jewel tones or all brights, like in the above pic (source: my Korean Acne Tips post). Not that you'd think it from my Instagram feed but I actually really enjoy using lots of colour!
- Try composing little squares of filled colour on Photoshop using hexcodes and almost create your own Dulux paint sample strips to see what colours you like the look of together.

- One failsafe way to work with colour is by using several items from the same brand - they've the same packaging so are guaranteed to go together! In the above example (source: Burberry Favourites post), I've really been quite lazy and just picked out the gunmetal grey and pinkish tones from the Burberry packaging and chosen a throw, a tray and a magazine cover in only those colours.


PROPS + LIGHTING
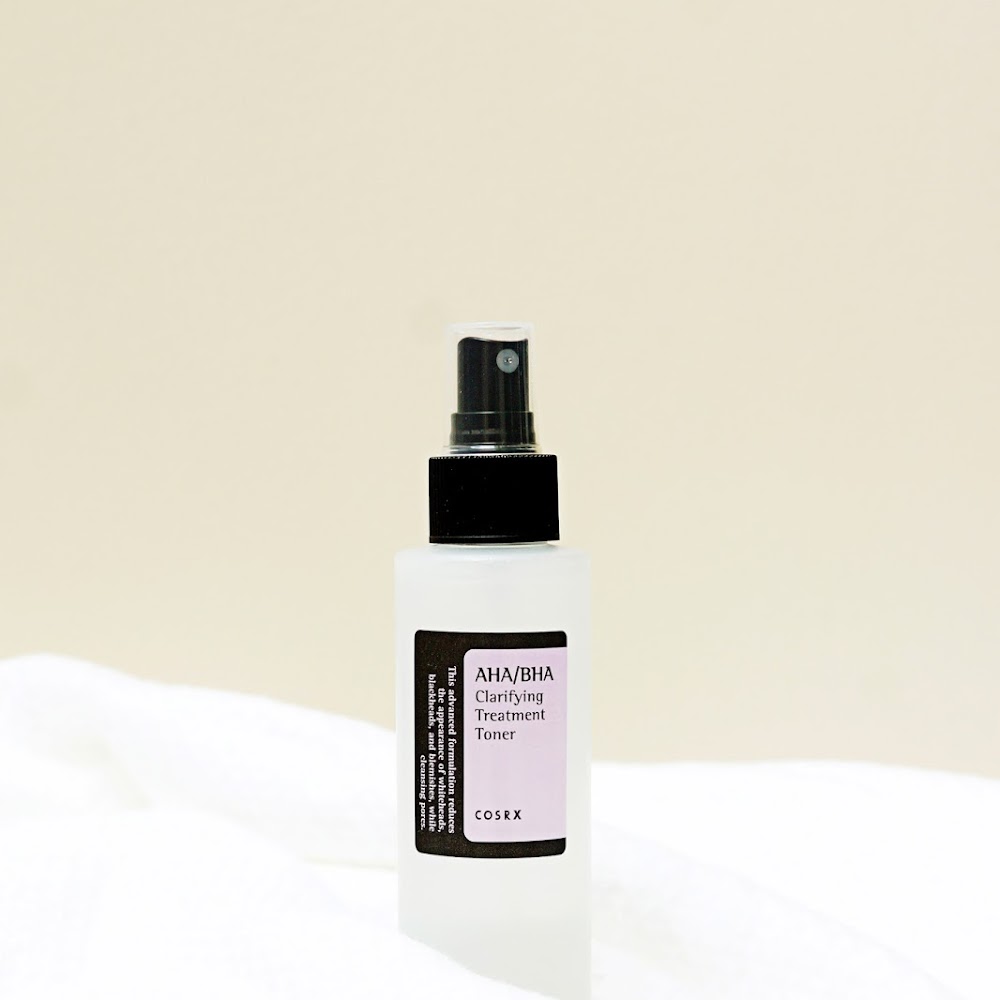
What props I use definitely depends on the type of photograph I'm taking, and what lighting I have at my disposal. Strong, almost horizontal sunrays work so well with glass or semi-transparent objects to create some interesting shadows as the light refracts through the item. Using a soft, textiled background over something shiny absorbs a little light and can help diminish those annoying flashback spots you can get when your lighting is less than ideal. In the above photograph (source: Fresh Faced In 5 post), the background on the right side was reflecting too much so I placed the fluffy rug there to diffuse that harsh reflection a little.
FLOWERS
I just thought I'd share a quick couple of tips for using flowers as props to get the most out of them:

- Try using flowers whole whilst they're new and fresh, or having them in a vase, like the lefthand shot (source: BTB Questionnaire) and then scatter the petals when they're starting to wilt and look a bit lacklustre, as in the righthand photo (source: Tips For Spending Less On Beauty post) - you can probably even see my roses looking a bit sad and droopy!

- Don't feel the need to buy expensive, fresh flowers all the time. A good quality artificial flower will last you longer (try John Lewis for some good examples), or try finding some wild flowers or foliage to use as props instead. I used solely foraged bits of greenery in the above photo, which cost me nothing!

- Turn the small petals from tightly structured flowers inside out to make them look bigger - this works especially well with roses.
- For carnations, grasp the green part of the flowerhead between your forefinger and thumb and give it a good roll to encourage the petals to open out and look more full.
DIY MARBLE TRAY
And now onto the DIY!

I've had a number of you ask where I bought this marble tray from and the truth is, I made it! And what's more, is how positively simple it is to recreate (hence why I'm throwing this tutorial in with this post) so here's what you'll need:
- A plain box photoframe with a raised frame - available from many places but my one specifically is from Ikea.
- Some marble contact paper - this is the one I use.
- Some mounting card in the dimensions to fit your frame.

I'm sure you can preempt the method before I even begin!
1. Remove the glass piece from your frame and discard any of the display paper inside.
2. Cover your mounting card in contact paper, using a wad of teatowel to remove any air bubbles - I've folded mine over onto the back, mostly because I hadn't the patience to properly measure and cut my 'marble' - either method is fine.
3. Reassemble your frame - glass first, 'marble' next, and secure with the backing clips in the frame.

And we've finally reached the end of this installment of my photography series - I really hope that you found this post useful, and I've hopefully addressed all the questions I've amassed on props and photography styling. By no means should you feel obliged to dress your photographs or style them in any way, but if you wish to inject a little extra pizzazz into your snaps then props are a great place to start. Happy styling all!


Social Icons